How Are Custom Orthotics Made?

Dr. Zac Cartun, MD
Doctor of MedicineCustom orthotics are made from a precise 3D scan, mold, or imprint of your feet after a thorough assessment has been performed by a specialist. This assessment often involves medical history taking, physical examination of the feet, biomechanics, and gait analysis, and, in some cases, imaging.
Key Takeaways
- Custom orthotics are person-specific and will, therefore, only be effective for the person they were originally made for.
- The process must include a thorough assessment of each foot to determine what is required.
- Each custom orthotic is designed with specific functions and user in mind. These include the types of materials to use and the design.
- Custom orthotics are often more expensive than over-the-counter inserts because a lot more go into their production, and they offer more value.
What are Custom Orthotics?
Custom orthotics are shoe inserts specifically designed to fit the foot structure and needs of a specific individual. This is different from over-the-counter inserts that are generic and available for general use. Though both custom and OTC inserts are meant to provide arch support, shock absorption, foot alignment, posture improvement, and balance to generally promote foot health, custom orthotics offer these functions with greater precision and efficiency. This is why they are effective for foot conditions that have shown no improvement with OTC inserts.
They are designed to support and align specific foot types and are typically more expensive than OTC (over-the-counter) orthotics because of the time, material, and design process involved in building one. They must be precise and accurate when used to treat specific foot types. This article will focus on the process of making a custom orthotic.
How Are Custom Orthotics Made?
Custom orthotics are made following a general process that involves the following:
Initial Assessment
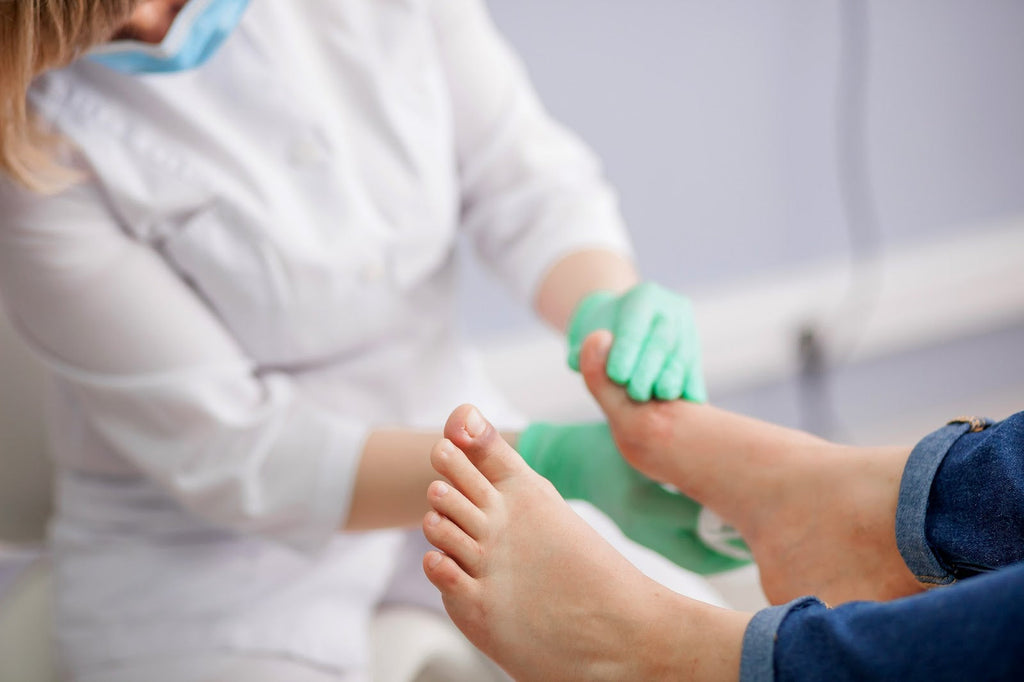
This is the first step in the process, and it involves a consultation with an appropriate healthcare professional who will get your medical history, physically examine your foot structure, and then do a gait and posture analysis. All of these will be done to identify if there are any biomechanical issues, the pain points, and how orthotics can help the condition.
Taking a Cast of the Foot
Having concluded the assessment, a cast of the foot will be made. A cast is a negative impression of a foot, and when done right, it captures a foot's curves, shape, and contour. Casting techniques have developed from the use of plaster to 3D scanners.
There are various methods of creating a cast, but the most common are plaster casting impressions, foam box impressions, and computer-modeled casts:
Plaster Casting Impression
The next stage is plaster casting. This is one of the earliest casting techniques for making orthotics. It is favored because it is non-weight-bearing—that is, the patient lies on their back, and the practitioner casts the plaster on the foot. Non-bearing casting techniques are typically more accurate, ensuring that orthotics fit perfectly around the patient's feet.
The Plaster Casting Process
The plaster casting process involves the following steps:
A: The patient is instructed to lie on their back and remain still. Patients can also lie on their chest or kneel on a chair with their toes pointed to the ground.

B: Each portion of plaster is dipped in water and squeezed gently.
C: The plaster is wrapped on the heel, arch, and toes, ensuring that the foot remains neutral and does not push outward or inward.

D: The specialist waits for the plaster to dry and then carefully removes the mold.
Plaster casting gives an almost precise cast of the feet, making it excellent for creating comforting and agile custom-made orthotics. However, the process can be messy, plus the plaster may break if transported.
Foam Box Impression Cast
Foam box impression is a technique in which the patient pushes their foot through soft foam to form the foot's shape. The procedure is done with the help of a pedorthist, who ensures that only minimal force is used and the patient keeps the foot still. The process takes less time than plaster casting and isn’t as messy; however, the semi-weight position of the foot means that small movements may lead to casts that are inconsistent with the shape of the foot.

Foam Box Impression is less messy but might not be as accurate as plaster casting. Albeit, it has its advantages, which include the following:
- It is excellent for people with painful foot protrusions. Plaster casting involves considerable pressure, which increases the pain of protrusions.
- Foams are usually much softer and take considerably less time, making the procedure less painful and quicker.
- This method is appropriate for restless patients like children. The pedorthist can push their foot in and out within seconds.
Computer-Modeled Scanning
3D scanning is a technologically driven foot-casting technique that is getting more popular, with brands like Stride Soles at the fore of its adoption. Depending on the device, the casting method can be weight-bearing or non-weight-bearing. Weight-bearing devices involve standing on the scanner, which takes several pictures of your foot.
3D scanning isn't really 3D. It's just a system where multiple pictures of your foot from multiple angles are taken, and then the algorithm combines all the pictures to create a near-perfect impression of the foot. 3D casting can also be done through special 3D capture tablets and devices.
Advantages of Computer-Modeled Scanning
- Easy casting process: The process is simple because it's technologically driven.
- No transportation: Unlike plaster casting and the foam box technique, where the cast is transported to an orthotic laboratory, 3D casts can be printed into an orthotic immediately.
- The quality of the printer determines the quality of the orthotic device.
- Digitally created models cannot be damaged. The pedorthist saves them to a local device or the cloud.
- Several copies of the same orthotic can be produced within a short period.
Building an Orthotic From a Cast
After obtaining a 3D model of a patient's foot, the model or cast is usually sent to an orthotic laboratory. However, you can build your own orthotic device with the right materials and tools.
The material that will be used will depend on the purpose of the orthotic. Accommodative orthotics need very soft material like gel and plastic. People with flat feet who want to prevent overpronation of the feet need more rigid materials to hold their feet in one place.
To build an orthotic device:
A: The mold is cleaned. When foam boxes are used, there will likely be visible foam threads over the mold. Using an iron brush, these foam threads are wiped off, and curved rasps are then used to take off the edges and smooth off imperfections.

Practitioner Cleaning a Mold: Image Source: https://www.youtube.com/watch?v=eFQGisZM1wU
B: Necessary markings, which will be transferred to the orthotic material, are made on the mold.
C: The material is trimmed (in this case, plastic) to the needed size. The corner of the plastic where the heel will sit is cut off to prevent creasing. The size of the orthotic will determine the size of the plastic. Orthotic sizes include full-length, half-length, and three-quarter length.

Practitioner Cutting the Material for the Orthotic. Image Source:
https://www.youtube.com/watch?v=eFQGisZM1wU
D: The plastic is placed in an oven until it changes color. At the same time, the cast is placed in the vacuum device.

Plastic Being Placed in the Oven for Softening. Image Source:
https://www.youtube.com/watch?v=eFQGisZM1wU
D: The plastic is transferred from the oven to the cast, and the vacuum device is closed, sucking out the air and letting the plastic wrap seamlessly over the cast.

Vacuuming Process. Image Source:
https://www.youtube.com/watch?v=eFQGisZM1wU
E: At this point, the orthotic is ready. To remove the excesses, the newly produced orthotic is filed down. A heel pad or other accessory can also be glued to the device.
Producing Orthotics Using 3D Technology
3D technology has reshaped the way we produce orthotics. Depending on the machine, the 3D scanning process can take about three minutes. Patients need to stand still throughout the scan. The result is usually more detailed, showing the patient's gait, pronation, and pressure points. Printing can be done immediately, and you can print multiple orthotic devices at once.
Conclusion
Orthotic devices are often built in orthotic laboratories, and the process begins with a thorough assessment and evaluation, then taking a perfect or near-perfect cast of the patient’s foot. The time that will be spent building an orthotic device will depend on factors like the technique used for casting and printing, materials used, and the need for attachments like heel pads.
The best custom orthotics perfectly fit and do exactly what they were created for. For example, an orthotic, custom-made to correct improper body alignment, should be rigid, unlike soft orthotics that accommodate the foot.